Last Updated on February 7, 2018
I’d like to post a Thermaltake WATER 3.0 Riing RGB 240/360 review because it is one of the most popular RGB liquid coolers on the market right now and many want to know if it’s good enough to stand the test of time and if the performance is worth the dollars spent.
I’ve been using this cooler for almost a year now and it has been doing very well for me. My build has the 240 version installed cooling an i7-7700k and it’s able to handle a slight overclock just fine. I’ll be getting into more details as we move along with the post.
With that, let’s get to the review.
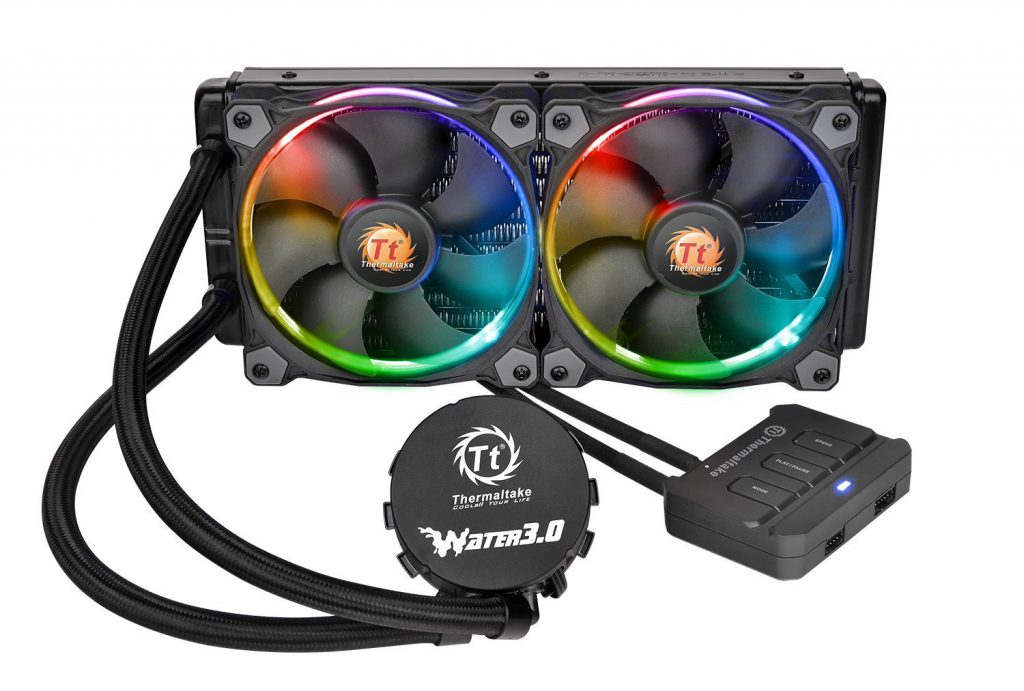
Product: Thermaltake WATER 3.0 Riing RGB Liquid CPU Cooler
Price: ~$120 / ~$180 – Depends on the version
Cheapest Place To Buy: Amazon.com
Warranty: 3 Years
My Rating: 8.5 out of 10
Thermaltake WATER 3.0 Riing Overclocking Test
The first point I’d like to get across with this cooler is its ability of being able to overclock and keep temps down on the CPU. I’m sure most if not everyone wanting to use this cooler has overclocking in mind so it’s one of the most important parts to go over.
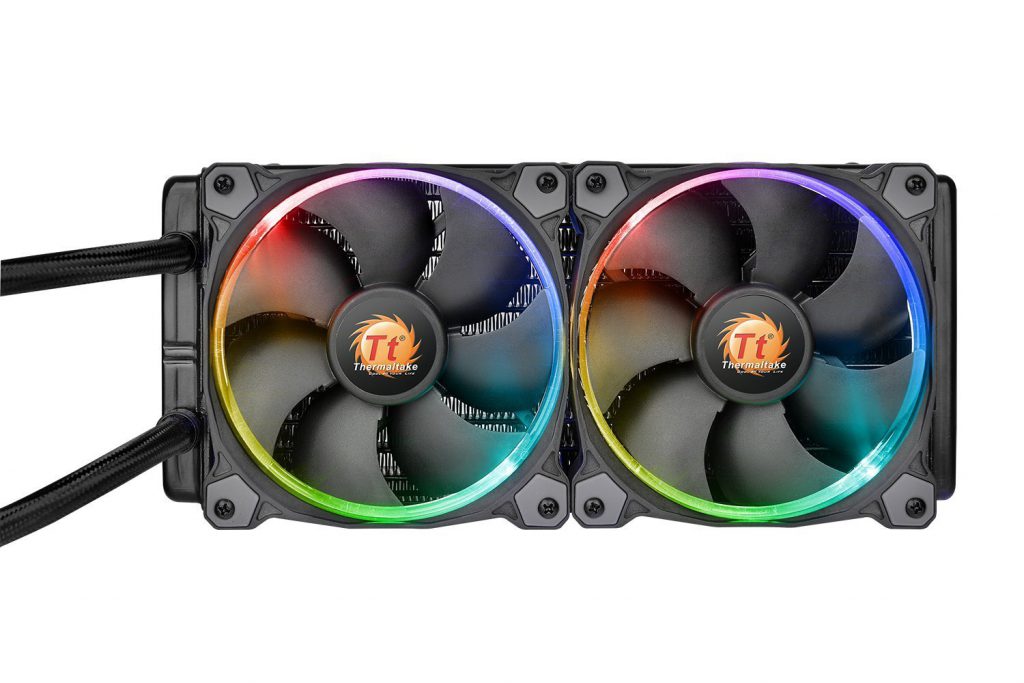
As I said earlier, I’m using an i7-7700k in my build that uses the Thermaltake WATER 3.0 240 version. This version has two 120mm fans with the radiator.
I decided to do a small test overclocking the i7-7700k to 4.7GHz to see if the cooler was going to be able to keep the CPU cooled down enough while under a heavy load.
I tested this with a couple of titles that I know are very demanding on CPU power, games that would be using the CPU the most. MSI Afterburner is the tool I used, a great tool to monitor CPU temps as well as other stats such as FPS, GPU temps and more.
The first test was done with PlayerUnknown’s Battlegrounds – a game that relies heavily on CPU usage. Recently, there have been many optimization updates to PUBG which have helped out with CPU usage but it’s still a good test to go with.
With PUBG, the highest temp that was seen was at 70°C with an average of about 65°C.
This is about where you’d want to be at with CPU temps while the CPU is being used a lot. Typically, if you’re getting over 80°C then you need to turn down the overclock or get better cooling if you’re getting temps like that with a stock cooler.
The second test was done with Assassin’s Creed Origins – another game that uses the CPU a ton, CPU usage was much higher with Origins than what it was in PUBG.
With Assassin’s Creed Origins, the highest temp that was seen was right around 76°C-78°C with an average of around 70°C.
Although that is pretty high, it is to be expected with a game like this. It doesn’t have the best optimization when it comes to the CPU but again, anything over 80°C is where you should be worried.
To sum up overclocking with this cooler, it works well! Idle temps averaged out at less than 50°C with the i7 I’m using and with a slight overclock everything was stable and cool after a long gaming session.
Note that I went with the basic overclock setting that was provided by a program specifically made for the motherboard that I’m using which bumped the i7 speed up to 4.7GHz. I have not tested going beyond that speed.
Thermaltake WATER 3.0 Riing Design
There were a few flaws in the design when I was installing the 240 version with my Thermaltake Versa C21 case which was made with a cooler like this in mind.
 First off, getting the screws lined up with the fans on the radiator was kind of a pain and I actually wasn’t able to screw in each screw to the correct slots.
This was due to the CPU power cable being in the way of one screw hole and the other was partially covered by my motherboard’s shield.
I doubt this is the case with every single build that uses this cooler but I figured that since I was also using a Thermaltake case that getting this cooler in would be a breeze.
After getting corner screws in, it seemed sturdy enough to stay put which it has. The fans are working as you’d expect them to and continue to keep the setting I have set using the fan controller.
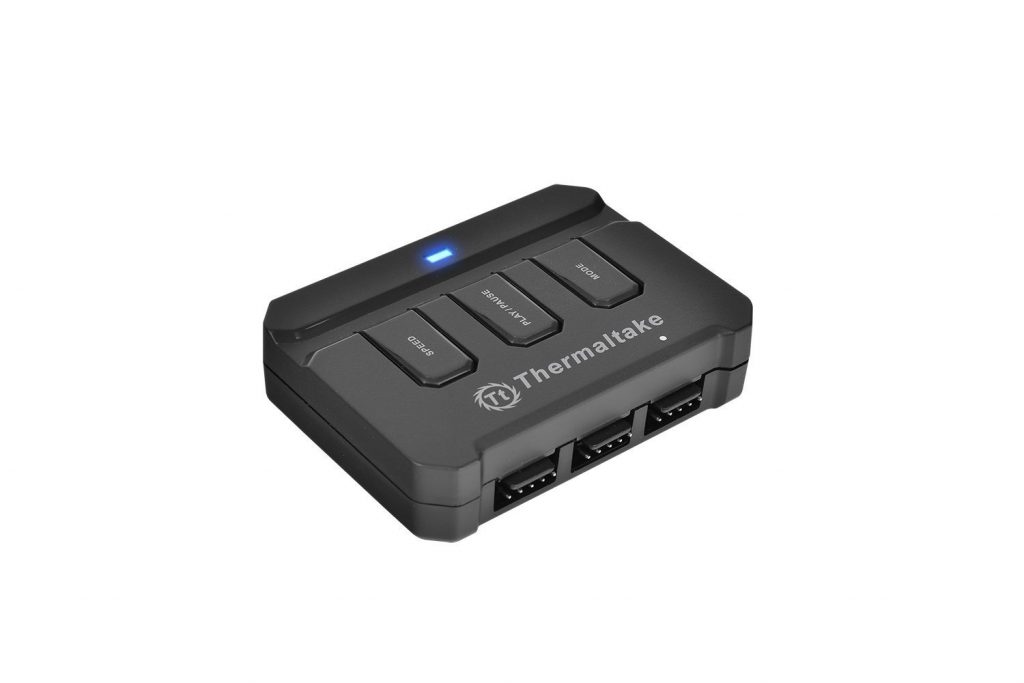 The fan controller has three buttons to toggle the fan speed between 400-1000 RPM / 800-1500 RPM, a Play/Pause button for starting/stopping the 256 color RGB cycle and a Mode button for setting a solid color. Those solid colors are between red, blue, green and white.
As for the RGB lighting, they’re excellent. I mounted the radiator on the top of my case since it was the easiest place for it and because of that I can’t see the RGB lighting as well from the top, but when you look in through the side glass it looks very cool!
The LEDs used with the fans are bright, I keep the color mode to cycling through all of the colors and it hasn’t lost any quality over time.
Another portion of the design they got just right is with the compatibility with different types of sockets. Out of the box you’ll be able to use this cooler with LGA 2011/1366/1156/1155/1150 sockets with Intel coolers since it’ll come with the right brackets that you’ll need for the socket you have with your motherboard.
If you plan on using an AM4 socket then you’ll have to buy the bracket required for that separately, it’s available on the product page.
Besides the screws being hard to get all of them in, the design is on point here. Made out of great material, everything is sealed so there’s no need for adding in or removing liquid and the overall usage is great. It’s bound to stand the test of time.
Thermaltake WATER 3.0 Riing Installation
The instructions that come with are clear enough to follow. As long as you match up the right parts with the right labels then you should be fine. You can take a look at this PDF version of the instructions if you want to.
You’ll need a compatible case depending on which version you plan on using with your rig. The 240 version uses two 120mm fans with the radiator so you’ll need room for those two fans being together. With the 360 version, you’ll need three 120mm fan slots to mount with the radiator.
All of the necessary screws and what not will come with and there will be a few extra pieces to come with as well. You’ll be setting up the bracket first by following the instructions that are labelled with whatever socket is correct.
After getting the heat sink installed correctly you’ll then be able to mount the radiator and fans. Be sure to take your time with this as if you don’t you’ll risk using the wrong bracket and you’ll have to start from the beginning again.
The fan controller has velcro that you use to mount it to wherever you have room to put it. I placed mine right on the outer part of where a CD drive or external fan controller would go.
Thermal paste will come pre-applied on the heat sink but you are more than welcome to wipe it clean and use a different kind if you want. I decided to use the paste that was pre-applied and it has been working great!
Is This The Right Cooler For You?
I’m not sure if I’d go as far as to say that it’s the absolute best RGB liquid cooler on the market but it definitely has high quality performance and the lighting surely is superb.
For those of you looking for a liquid cooler that can handle basic overclocking that’s easy to install, is compatible with multiple socket types and has high quality RGB lighting then you need to consider this one for sure.
Don’t just take my word for it, check out some of the reviews over on Amazon as well!

This cooler has served me well for almost a year now and I couldn’t be happier. It’s exactly what I was wanting out of an aftermarket liquid cooler.
You made it to the end of the Thermaltake WATER 3.0 Riing RGB liquid cooler review!
What do you like most about it? Are you going to be using it with your build?
Let me know in the comments below! 😀
Hey there! 👋 I’m Colton, founder of PC Builds On A Budget.
Whether you need help putting your PC together, finding a great pre-built rig, or want some help finding awesome peripherals – I’ve got you covered!
I share my experiences of anything and everything related to gaming PCs with you here. 👍